The first of those being the dining room table. Back in May, we found this amazing solid wood table for only $125 at a local greenhouse. I worked a little on sanding the top, but hadn't touched the 6 chairs quite yet. The set takes up quite a bit of room in the garage, so Becky got to work this past weekend on sanding and staining all the chairs.
The varnish is actually not too bad on the chairs - they're pretty worn in for the most part. But the dust is pretty wicked, so a mask is definitely required. We're not sure of the type of wood, but it's got a nice rich tone to it, which makes the stain have a little red tone to it.
While I hung out with my brother-in-law watching the Tigers blow game two of their playoffs series against the Red Sox, Becky was able to get the rest of the chairs sanded, and then last night was able to get two more of them stained. As always, Bella was helpful.
Once they're all stained, we'll go through with a brush and some polyurethane to seal them up, then we'll stain the table. THEN there are 4 leaves to do as well. If the stain matches decently we might just leave those alone, since they're in good shape, but chances are they'll need to be done to match the stain.
We also had a dresser out in the garage that I'd primed but then never did anything with. It was supposed to be part of the master closet reno, but since that's so far in the future, Becky took it for the closet in the spare room. She wandered around Lowe's trying to find the perfect turquoise to match the squash-y yellow in there, and I think she made a great decision.
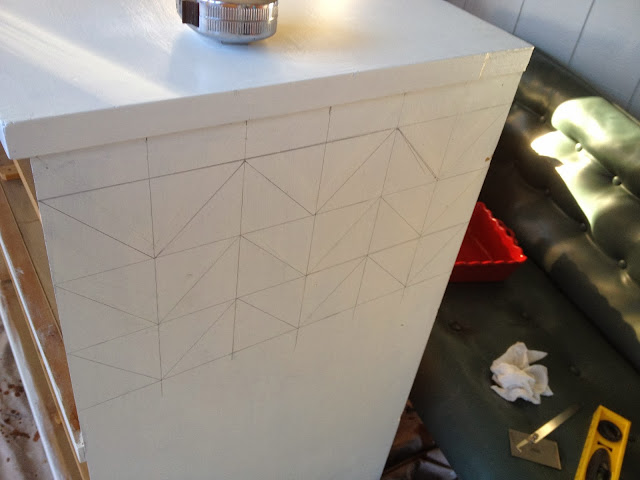
The original plan was to do Chevron on the sides, so I helped draw out the angles. Ultimately, the process was too involved, and really didn't matter since it would be in a closet and you wouldn't see the sides anyway. After drawing these out, she realized she could probably make a stencil and use that. We saw one made from cardboard, but I have to assume that would be really difficult to use, and you'd probably have to do a lot of touch up, since the paint would certainly get on the underside of that or bleed through and you'd end up with splotches. Anyone else have great ideas on easy ways to do Chevron? HANSEL IS SO HOT RIGHT NOW.
So anyway, yeah, the turquoise was perfect. She finished it off with spray painting the handles with a glossy silver (a nice change from the dull brass), and we got it upstairs and in place.
Some of the handles are a little bent, but overall it's pretty great!


